• Skip to main content
  • Skip to primary sidebar

Your Ideal Form

Helping you on your journey to your best self!

  • About
  • Coaching
  • Contact

Exercise

Getting Started with Lifting Weights

January 25, 2017 by Audrey D

Getting Started with Lifting Weights

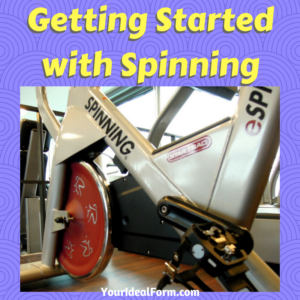
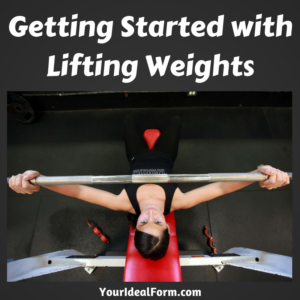
So you’ve got a good cardio routine down, but you’re really curious about the other half of the gym: the weights. It can be a bit intimidating over there if you don’t know what you’re doing, but I’m here to help you ease into it!

Let’s start by getting some facts straight: increasing your muscle mass is the only way to PERMANENTLY increase your metabolism and burn off more calories while you sleep. Don’t fall for the myth that lifting weights will make you bulky. If you want to get bulky, you will need to eat at a calorie surplus, eat a lot of protein, and for most women to get supper ripped, you will also need to take steroids. Lifting while eating to lose weight will give you the lean body you are looking for. “Toned” just means “having low body fat and showing some muscle definition.” If you want to get toned, you will have to lift weights. And you might be surprised just how much you’ll have to lift to start seeing that definition. If your purse weighs 10 pounds (some of us feel the need to carry whatever we might possibly need in case of any eventuality) or your toddler weighs 20 pounds, then toying around with five pound weights isn’t going to get you anywhere!

As always, consult a doctor. If you can, consult a trainer. Doing things incorrectly can hurt you, and we don’t want that. One session with a trainer to nail down your form and make sure you are lifting correctly can save you from a world of hurt and injury down the line.

Machines

Weight machines have you use levers to move a stack of weights. Working with a trainer will help you overcome the “I don’t know what I’m doing feeling” when approaching some of the weight machines. Some of them seriously look like medieval torture devices, and having someone show you how it works rather than figuring it out on your own can really make a difference. That said, newer weight machines at newer gyms will often have a diagram on them explaining how to use it. Weight machines tend to only work one way, so there is less chance of injury, since the machine forces you into a particular plane of motion. Whether with the help of a trainer, the guide on the machine, or asking the person who just hopped off the machine (people are generally happy to help if you just ask!), get into the proper position on the machine, use the pin to set a weight that’s good for you (start light, you can always increase later) and then work through as full a range of motion as you can.

Cable Machines

Cable Machines use a steel cable attached to one or more pulleys to move a stack of weights. Because the end of the cable that you hold can move around freely, cable machines let you work with a wider range of motion and exercises. Especially ones where you can adjust the height of the pulleys so that you can work different muscles. For example, you can attach a bar attachment to the cable, set the pulley low, and use it to do bicep curls. Or you can use that same bar attachment, set the pulley up high, and push down on the bar, working your triceps. By adjusting the pulleys and what attachments you use, you can easily get a full body workout in from just this one machine! Since the cable gives you a bit more freedom to move around somewhat, it is important that to get the most out of your exercises that you be sure to practice good form. Keep your core nice and tight, and for most exercises, you’ll likely want to keep a straight/flat (not rounded) back.

Dumbbells

Dumbbells move us into the realm of free weights. There is nothing restricting the movement beside your own muscles. Free weight exercises often require that you use auxiliary muscles for stabilization, giving you a better full-body workout. Dumbbell exercises are very versatile, and you can find them in most gyms, including hotel gyms if you tend to travel often. Depending on the exercises you are doing with dumbbells, you may want to consider using wrist wraps for extra wrist support. You may find that your arms can lift a certain weight without a problem, but your wrists end up being the limiting factor. If you’d like to get started with dumbbells, check the the end of this post for a free workout!

Barbells

Barbells are the next step up from dumbbells. Once you get into barbell lifting, form becomes VERY important. Olympic weightlifting and  power lifting use barbells for lifts such as: squat, deadlift, clean, jerk, snatch, and press. Many of these movements are complex, full-body movements and can give you an amazing workout. As they are complex, I do not recommend working on barbell lifts without a trainer or very experienced lifter to check your form. That said, once you get into barbells, it is hard to go back to lifting any other types of weights! You get to realize just how strong you are, and it makes you feel unstoppable!

If you have any questions at all about weight lifting, please ask in the comments below!


Share this:

  • Click to share on Facebook (Opens in new window)
  • Click to share on Twitter (Opens in new window)
  • Click to share on Pinterest (Opens in new window)
  • Click to email a link to a friend (Opens in new window)
  • More
  • Click to share on Reddit (Opens in new window)
  • Click to share on Pocket (Opens in new window)
  • Click to share on Tumblr (Opens in new window)
  • Click to share on LinkedIn (Opens in new window)

Filed Under: Exercise, Tips and Tricks Tagged With: Exercise, lifting, weight lifting, weights

Getting Started with Spinning

January 18, 2017 by Audrey D

Getting Started with Spinning

So running wasn’t for you, you wanted something low impact, but you don’t have access to a pool, or perhaps you just aren’t ready to be seen in a swimsuit yet. Have you thought about trying spinning?

Spinning is basically what happens when you take stationary cycling and give it a few shots of espresso. It is done in a group setting, with pumping music, possibly dim lighting depending on the studio, and an instructor at the front that tells you when to sit, stand, and what tempo and resistance to work at. Having that coach is awesome. You know that you’re getting a good workout, and you won’t leave feeling like you could have done better, or that you were just putzing around. The group setting can make it more fun, but a bit more intimidating. Don’t compare yourself to others in the class! Just focus on doing the best you can.

What you’ll need to get started

You’ll need water. Lots of it. Especially in colder climates where the air gets dry in winter.  Make sure your water bottle is easily drunk from while you’re moving. A wide-mouthed bottle will leave you wearing more water than you drink. A squeezable sports bottle with a sports valve top is ideal. A towel, cause you will sweat a ton. You could just use your shirt to wipe away sweat, but your shirt will likely also be drenched. Optional items include padded cycling shorts. Your ass WILL hurt, especially if you haven’t been on a bike in a long time. If you really enjoy yourself, and think that you are going to get serious about spinning regularly, you can look into special “clip-less” shoes. The pedals on the spin bikes have “cages” that you can slip your foot into, but if you flip them to the other side, you can clip in special shoes if you have them. Spin bikes do not glide. You can’t just stop pedaling and have the wheel keep turning freely, so you’re going to be moving your legs non-stop throughout the entire class. If you need a break, slow down, and/or slower the resistance, but don’t stop.

What to do

If this is your very first class ever, arrive early. Introduce yourself to the instructor and let them know this is your first time, and they’ll help you set up your bike and go over the important stuff with you, like how to control the resistance. This is also a good idea if it is your first class at a new studio; the equipment might be different than what you’re used to! The seat will seem high; it should be set to about your hip height. The instructor should also go over any terminology used in class, such as “positions” they might call out, meaning you change where on the handlebars you rest your hands, or whether you are sitting in the saddle or pedaling standing up. After you’re all set up and adjusted, hop on the bike, slide your feet in (or clip in) and start pedaling at a nice easy pace to warm up. From there, just listen to what the instructor calls out, and follow accordingly for an awesome workout!

A word on technique

To get the very best out of your spin class, it is important to have good form. As you pedal, be sure you are driving with your heel or focused on keeping a flat foot. You don’t want to only be pushing with your toes pointed down the whole time. Also, to double your results, remember to pull UP on the pedals as much as you push down. That’s the whole point of the cages/clips on the pedals; it allows you to pull as well as push, giving you the opportunity to work your leg throughout the entire revolution of the pedal. Spinning is great because you can adjust the workout to your needs. Feel like it’s getting too hard? Slow down your cadence (how fast you’re pedaling) and/or decrease the resistance. Feel like it’s a piece of cake? Crank up that resistance and pedal faster! What you do NOT want to do is just stop without giving your muscles a proper cool down, so while it’s okay to dial way back on the intensity (remember, don’t compare yourself to others in the class!), keep going and don’t stop!

Have you tried a spin class before? What were your thoughts?

Share this:

  • Click to share on Facebook (Opens in new window)
  • Click to share on Twitter (Opens in new window)
  • Click to share on Pinterest (Opens in new window)
  • Click to email a link to a friend (Opens in new window)
  • More
  • Click to share on Reddit (Opens in new window)
  • Click to share on Pocket (Opens in new window)
  • Click to share on Tumblr (Opens in new window)
  • Click to share on LinkedIn (Opens in new window)

Filed Under: Exercise Tagged With: Exercise, spinning

Getting Started with Swimming

January 11, 2017 by Audrey D

Getting Started with Swimming

So, perhaps running is not for you. You’ve tried it and hated it, or perhaps your joints really don’t like the impact. Swimming may be the workout for you.

Swimming is unique in the cardio world. For one, it gives you a full body workout. You aren’t just propelling yourself forward with your legs, but you are using your arms as well. Because you are surrounded by water, you don’t get all sweaty and gross like you would with other exercises. While it is a nearly zero impact workout, it is certainly not easy! If you have access to an indoor pool, you can swim year-round.

Caveats

Which leads us to the caveats for swimming. It can be easy to overdo it in the pool. The water keeps you cool and washes away your sweat, so it’s easier to keep going for longer. If you are just starting out and not a strong swimmer, be sure there is a lifeguard present! Always consult your doctor before starting a new exercise regimen.

Learn to swim

The first step is being able to swim a lap. Most lap pools are 25 meters from one end to the other. Olympic-sized pools are 50 meters long. If you do not know how to swim, or cannot swim an entire lap, or perhaps you don’t know the “proper” way to do the freestyle or front crawl stroke, then you need to start out with some swim lessons. Head on down to your local recreation center or YMCA and see what swimming lessons they offer. As you progress through the lessons, you will learn the proper way to do the main swimming strokes: backstroke, breast stroke, freestyle (or front crawl*) and even butterfly. You’ll also learn the proper breathing techniques to keep you as streamlined as possible while also getting enough air.

Build up your endurance

Once you can comfortably swim 50 meters, you can start building up your distance to get in a longer workout. This is easier in a standard pool, since adding 25 meters at a time is easier than jumping up 50 meters at a time. Building up distance in swimming is different than running. With running, you can always slow to a walk. With swimming, you can only slow down so much. It’s really either swim or sink. Most swimming programs will have you swim a certain distance, then take a rest at one end or the other. As you progress, your swim time gets longer, and the rest periods may get shorter.

For true beginners, there is a 0 to 700 program. It starts you off very slowly, then builds distance until you are swimming 700 meters in a session, although not all at once.

Go the distance

Once you are ready to progress further, or if you already have a decent cardiovascular base and are a decent swimmer, you can move up to the next level. A program I have used in the past is the 0 to One Mile swim plan. It starts off with a 700 meter day (not all at once though!) and then builds to a “swimmer’s mile” which is 1650 meters.

What you’ll need

To get started with swimming, you’ll need some equipment. Of course you’ll need a place to swim, and you’ll need a proper swimsuit. A good swimsuit will let you move through the water without creating drag, giving you a wedgie or, heavens forbid, getting loose and coming off mid-stroke. Goggles are also a must for protecting your eyes from the chlorine and letting you see where you are going. A swim cap is not necessary, but it helps prevent the strap of the goggles from pulling on your hair, and can help minimize chlorine damage to your locks.

Do you have any questions about swimming for exercise? Let me know in the comments!

* The stroke is technically the front crawl. Back in the day, in the Olympic “freestyle” event, swimmers could choose their strongest stroke for the race. Because front crawl tends to be the fastest for everyone, that’s the one every swimmer chose, so now, freestyle is synonymous with front crawl.

Share this:

  • Click to share on Facebook (Opens in new window)
  • Click to share on Twitter (Opens in new window)
  • Click to share on Pinterest (Opens in new window)
  • Click to email a link to a friend (Opens in new window)
  • More
  • Click to share on Reddit (Opens in new window)
  • Click to share on Pocket (Opens in new window)
  • Click to share on Tumblr (Opens in new window)
  • Click to share on LinkedIn (Opens in new window)

Filed Under: Exercise Tagged With: Exercise, swimming

Getting Started With Running

January 4, 2017 by Audrey D

Getting Started With Running

New year, new resolutions, lots of new people at the gym. Many people who resolve to lose weight think the best way to do so is by exercising, and the one exercise everyone knows how to do since they learned it at around three years old is how to run.

Caveat

I’m putting the not-so-fine print first. If your goal is to lose weight, you will get more bang for your buck by changing your eating habits rather than exercising. Running is fabulous exercise, it’s great for your health, and easily accessible to just about everyone since you don’t need a gym membership or super fancy equipment. But if I want a 200 calorie deficit in my day, I can either run 2 miles, or I can simply not drink a daily can of soda. As always, consult a doctor before beginning any exercise regimen.

Walk before you run

Runners always talk about that runner’s high and how much they love putting in the miles. And that’s true. There is a certain zen to just zoning out and focusing on nothing but the scenery and putting one foot in front of the other. That said, when starting out, running is HARD. To make sure you have a decent cardiovascular base for starting a running program, you should be able to walk at a brisk pace for 30 minutes without feeling like you’re going to die. If you cannot manage that yet, that’s okay! Work on adding a little time and distance, bit by bit until you can hit that 30 minute mark.

The all-in approach

Once you’re ready to start running, there are a couple of methods to increase the distance/time you can run. One method is to simply start running, and see how far you get. Spend the rest of the 30 minutes walking it out. Next time you go for a run, try to go just a teeny bit further, even if it’s one more driveway or 10 more seconds. Incrementally increase the time/distance you run until you can run for the full 30 minutes.

The couch to 5K approach

There are countless apps that will coach you through the famous “couch to 5k” program. In 8 weeks, the program takes you from not running, to running a full 30 minutes. It does this by alternating between walking and running. In the beginning, you walk for longer, with short bursts of running. As the weeks progress, the run intervals get longer, and the walks get shorter. Many people tend to have to repeat a week (when getting back into running after a very long hiatus, I also had to repeat a week), but it is nice to know that there’s a light at the end of the tunnel, as it were, for when you will hit the goal of running for 30 minutes, non-stop.

Either way

No matter which method you go with, there are some universal constants. When starting out, it is super important to have a rest day between your runs. Running is awesome, but it’s also a LOT of stress on your body, so be sure to give yourself time to recover. You will need to learn to breathe again. The toughest part when first starting out with running is getting the breathing down. That’s what stops most people; it’s not that their legs give out, it’s that they can’t get air. If you find this happening to you, try to focus on your breathing, and perhaps try slowing your pace down some. When I feel like I can’t breathe, I try to breathe in for x steps and then breathe out for x steps. How many steps equal x depends on your needs. Your body will eventually adjust, but it’s a bit of a shock to the system at first. No matter how fast you can walk, when you switch from walking to running, the breathing is completely different, and you’ll need to learn how to deal with it so you don’t get winded.

Preventing injury

It’s January. It may be snowy or icy where you live. Perhaps you live in a warm climate, but the sidewalks are just terrible. Perhaps you don’t have sidewalks and need to run in the street. Be aware of where you are putting your feet so that you don’t sideline yourself with an injury. If you are running in the street, wear reflective clothing and run against traffic, so you can see who is coming. One of the most common running injuries is shin splints. Shin splints are caused by the impact of running. Running on a dirt trail or rubber track can help minimize the impact, as can running on a treadmill. If this isn’t an option, try landing more toward the middle of your foot, rather than striking with your heel, and allow your ankle to do its job as a shock absorber to lessen the impact. Keep in mind, this will make your calf muscles VERY sore at first, until they get used to it.

The Shoes

The only real equipment you need to get started with running is a good pair of running shoes. There are MANY schools of thought on this one. The best shoe for you is one that you feel comfortable in, and doesn’t make your feet hurt or blister. Whether you need any sort of motion control or extra padding, or whether you prefer to go a minimalist route is up to you. If running in the same sneakers you’ve had for the past 20 years feels fine, then stick with it. If you’ve got some money to spend, and new gear will help keep you motivated, visit your local running shoe store, where a specialist can help you find a pair of shoes that works well with your particular feet and gait. Note: find a specialty running shoe store. Your general sporting goods store folks are nice people, but don’t have the specialized training to fit the right shoe to your foot.

Get out there!

Hopefully this information will help you get started if one of your goals this year is to get running. If you have any questions about running, let me know in the comments!

Share this:

  • Click to share on Facebook (Opens in new window)
  • Click to share on Twitter (Opens in new window)
  • Click to share on Pinterest (Opens in new window)
  • Click to email a link to a friend (Opens in new window)
  • More
  • Click to share on Reddit (Opens in new window)
  • Click to share on Pocket (Opens in new window)
  • Click to share on Tumblr (Opens in new window)
  • Click to share on LinkedIn (Opens in new window)

Filed Under: Exercise Tagged With: Exercise, running

Why Diet Matters More than Exercise for Weight Loss

October 26, 2016 by Audrey D

Why Diet Matters More than Exercise for Weight Loss


I’m sure you’ve heard the oft-cited statistic that diet is 70-80% of weight loss, and that exercise makes up the remainder. Let me explain why.

Earlier this year, I got myself a FitBit Blaze which has a built-in heart rate monitor. This means that by telling the app my height and weight, it bases my calorie burn throughout the day on that combined with my heart rate. This helps give me a much more accurate picture of my TDEE than just using a calculator alone. That said, the calculator I tend to use is really close to what my FitBit tells me.

The other data that I get from my FitBit is how many calories I burned during exercise, and how that compares to my total calories for the day. In the example below, I went for a one-mile walk and burned 126 calories. But that was just a smidgen of the 2020 calories I burned over the course of the entire day.

calories burned

So where does the rest of that calorie burn come from? That’s where your basal metabolic rate (BMR) and Total Daily Energy Expenditure (TDEE) come from. BMR is how many calories your body burns just to keep you alive if you laid in bed all day. TDEE takes into account your average activity throughout the day, and includes things like calories burned to digest food, get dressed, walk to the coffee machine, bounce your leg up and down if you’re the fidgety type.

So you can see that very few of the calories I burned for the day are attributed to the exercise I did. Just over six percent. Most of my calories burned are based on my BMR. The only way to change your BMR is to increase your lean muscle mass through resistance training (either body-weight exercises or lifting weights). On the other hand, I consumed just over 1500 calories that same day. That comes out to about 74% of the calories I burned for the day. So you can see how changing how I eat can have a much greater impact on my weight than changing how much I exercise.

Which brings us back around to the weight loss equation. TDEE minus 500 calories each day equals weight loss of one pound per week. In order to burn off 500 calories, I would have had to walk five times as far. That would have been 5 miles, and it would have taken me nearly two hours at the pace I was going (which was, admittedly, somewhat leisurely). That is a lot of time and effort. It is far easier for me to simply cut 500 calories worth of food from my diet. If you drink your calories in the form of soda, energy drinks, alcohol or specialty coffees, the quickest way to cut those calories is to switch to water or a calorie-free version of your favorite drink. I get that it is difficult to go from a double shot mocha with whipped cream to black coffee, but if you can manage the swap, you can reach your goals so much sooner, and without feeling like you’ve had to completely sacrifice something.

Share this:

  • Click to share on Facebook (Opens in new window)
  • Click to share on Twitter (Opens in new window)
  • Click to share on Pinterest (Opens in new window)
  • Click to email a link to a friend (Opens in new window)
  • More
  • Click to share on Reddit (Opens in new window)
  • Click to share on Pocket (Opens in new window)
  • Click to share on Tumblr (Opens in new window)
  • Click to share on LinkedIn (Opens in new window)

Filed Under: Exercise Tagged With: calories, dieting, Exercise, Nutrition

Eating Back Exercise Calories

September 21, 2016 by Audrey D

Should You Eat Back Calories Burned Off from Exercise-

A question I see get asked a lot is whether or not one should “eat back” the calories burned during exercise. You’ve calculated your TDEE, and you’re eating at a deficit to lose weight*, but that exercise raises your TDEE some, so you’re now at a greater deficit. Should you eat those calories back?

This is a bit tough for me because to be perfectly honest, I just don’t get it. After doing all that work, why would you negate it all by eating it all back? There’s also a big potential pitfall with eating back your calories: overestimating how many calories you’ve burned and thus eating back more than what you just worked off. Studies show** that people regularly overestimate how many calories we burn during exercise. And it’s not our fault; cardio machines grossly overestimate how many calories you burn, and even fitness apps can just do a best guess based on national averages. So the treadmill/app tells you that you’ve burned 300 calories when it’s really 200, and you think that means you’ve earned that 250 calorie snickers bar. But in reality, you’ve undone all your hard work, and you’re now over your budget.

Studies also show we tend to be bad at estimating how many calories we eat***. In this case, we tend to underestimate the number of calories in the food we have. With more and more places putting calorie counts on menus, this is getting harder to do, but if this isn’t commonplace where you live yet, it can be easy to convince yourself that your post-workout smoothie is healthy, and therefore much lower in calories than it really is. Combined with the elliptical machine telling you that you burned more than you actually did, and it becomes really easy to eat more than your TDEE for the day.

So, what do you do if exercise leaves you woozy and you have to have something after your workout? Here are a couple of tips:

  • Aim for eating back half the calories you burned at most.
  • If working out is always leaving you feeling ravenous, try switching to lower-intensity exercise.
  • A controversial opinion is to stop exercising all together and just focus on your diet.
  • Try to think of any calories burned during exercise as merely a bonus or a turbo boost to get you to your destination faster!


*If you’re trying to gain muscle, you definitely want to eat back those calories, getting as much of them from protein as possible!
** http://www.ncbi.nlm.nih.gov/pubmed/26469988
*** http://www.ncbi.nlm.nih.gov/pubmed/1454084

Save

Share this:

  • Click to share on Facebook (Opens in new window)
  • Click to share on Twitter (Opens in new window)
  • Click to share on Pinterest (Opens in new window)
  • Click to email a link to a friend (Opens in new window)
  • More
  • Click to share on Reddit (Opens in new window)
  • Click to share on Pocket (Opens in new window)
  • Click to share on Tumblr (Opens in new window)
  • Click to share on LinkedIn (Opens in new window)

Filed Under: Diet, Exercise Tagged With: diet, Exercise, tdee

  • « Go to Previous Page
  • Go to page 1
  • Go to page 2

Primary Sidebar

FREE Guide to Diet Plans

sign up now for a free 13 diet comparison guide
* = required field

powered by MailChimp!

Copyright © 2025 · Genesis Sample on Genesis Framework · WordPress · Log in